Before you commit, here’s what you need to know.
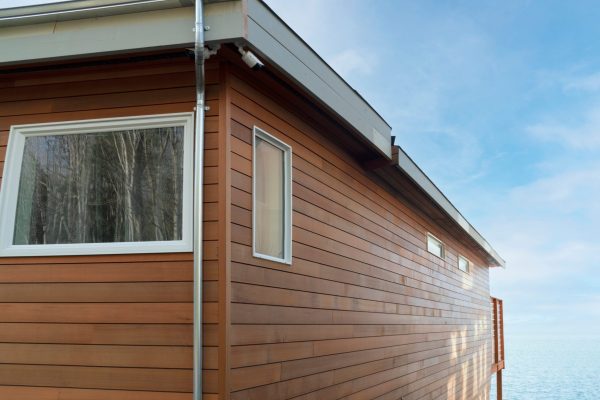
Common Types of Siding: Pros & Cons
1. Vinyl Siding
Pros:
Affordable and widely available
Low maintenance
Wide range of colors and textures
Cons:
Can warp or crack in extreme temperatures
Less durable in high-wind or hail-prone areas
Fades over time with sun exposure
Best for: Budget-conscious homeowners looking for a quick exterior update.
2. Fiber Cement (e.g. James Hardie®️)
Pros:
Extremely durable and fire-resistant
Resists termites and rot
Great visual appeal (mimics wood)
Cons:
More expensive upfront
Heavier and labor-intensive to install
May require repainting over time
Best for: Homeowners who want a strong, long-lasting, low-maintenance material.
3. Engineered Wood Siding (e.g. LP SmartSide®️)
Pros:
Real wood look without the high maintenance
Impact-resistant and treated to resist pests and decay
Lighter and easier to install than fiber cement
Cons:
Can be prone to moisture issues if not installed properly
Typically needs painting or staining
Best for: Those who love the look of wood but want something more durable and cost-effective.
4. Traditional Wood Siding
Pros:
Classic, natural beauty
Can be painted or stained any color
Biodegradable and eco-friendly options available
Cons:
High maintenance (must be sealed or painted regularly)
Vulnerable to moisture, termites, and rot
Expensive to install and maintain
Best for: Historic homes or custom builds where appearance is the top priority.
Tips for Choosing the Right Siding for Your Home
✅ Consider your local climate – Some materials perform better in certain weather conditions.
✅ Think about maintenance – Will you repaint every 5 years or prefer low-upkeep options?
✅ Factor in long-term costs – Cheaper siding may require costly repairs or early replacement.
✅ Work with trusted professionals – Proper installation is just as important as the material itself

Let’s break it all down.
What Are Gutter Guards?
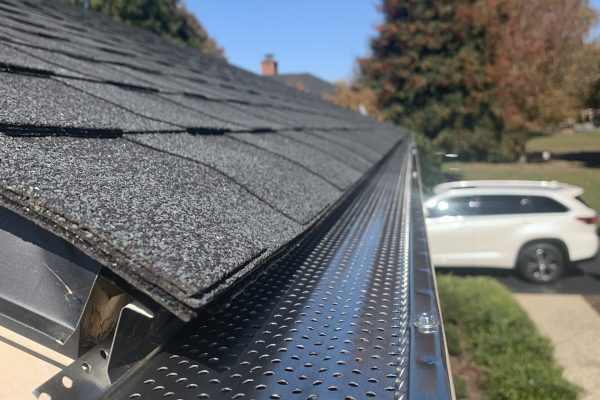
Gutter guards, also known as gutter covers, leaf filters, or gutter screens, are protective systems installed over your gutters to block leaves, twigs, and other debris while allowing rainwater to flow through.
There are several types:
Mesh Screens
Foam Inserts
Brush Gutter Guards
Reverse Curve (Surface Tension Systems)
Micro-Mesh Systems (like LeafFilter®️, GutterRx®️)
✅ Benefits of Installing Gutter Guards
Prevents Clogs & Overflows – Keeps debris out and water flowing freely
Reduces Maintenance – Fewer cleanings, fewer trips up the ladder
Protects Your Home – Avoids water damage to roofing, fascia, siding, and foundation
Pest Deterrent – Keeps rodents, birds, and insects out of your gutters
Extends Gutter Life – Less stress and wear on your gutter system over time
Potential Drawbacks to Consider
Upfront Cost – Professional systems can range from $6–$15 per linear foot installed
Not All Guards Are Created Equal – Cheap DIY versions may cause more harm than good
Pine Needles & Fine Debris – Some systems still require occasional maintenance
Improper Installation Can Lead to Overflow or Roof Damage
Are Gutter Guards Right for Your Home?
Gutter guards are most effective if:
You have lots of trees near your home (especially maple, oak, or pine)
You can’t or don’t want to clean gutters multiple times per year
You’ve had past issues with clogging or water overflow
You want to protect your roofing and foundation investment
If you live in a wooded area or storm-prone region, the long-term benefits far outweigh the cost.

Step-by-Step: How to File a Roof Insurance Claim
1. Inspect Your Roof After a Storm
Even if you don’t see visible leaks, storm damage can go unnoticed. Look for:
Missing or lifted shingles
Granule loss or dark spots
Dented flashing or gutters
Water spots on ceilings or attic
Pro Tip: Don’t risk climbing up—call a professional for a free roof inspection.
2. Document the Damage
Take clear photos or videos of all visible damage—on the roof, siding, gutters, and interior. This documentation will support your claim and help speed up the approval process.
3. Contact Your Insurance Company
Let your insurer know you’d like to file a roof damage claim. Ask about:
Your deductible
What types of storm damage are covered
Whether temporary repairs are reimbursable
They’ll give you a claim number and send out an adjuster.
4. Hire a Trusted Roofing Contractor (Like Us!)
Before or after the adjuster’s visit, bring in a licensed contractor like Bright Exteriors to:
Perform a thorough inspection
Provide a professional damage report
Meet with your adjuster to ensure nothing is overlooked
We advocate for you during the process and ensure a fair claim evaluation.
5. Get Your Claim Approved
Once the adjuster completes their report, your insurance company will approve the claim and release payment—usually in two parts:
An ACV payment (Actual Cash Value) up front
A final payment once repairs are complete (Recoverable Depreciation)
6. Schedule Roof Repairs or Replacement
We’ll work with you to schedule the restoration quickly and efficiently. Our team uses high-quality materials and offers full documentation for your insurer when the job is done.
Common Questions About Roofing Claims
❓ Will my premium go up?
Not usually for weather-related claims—it’s considered an “Act of God” and typically doesn’t affect your rates.
❓ How long do I have to file a claim?
Most policies allow up to one year, but the sooner, the better.
❓ What if my claim is denied?
We can review the adjuster’s report and help file a supplemental claim if damages were missed or under-valued.
